
Pot-bound plants can be defined as plants that seem to have run out of growing space and are literally stuck in the mud in their pots. Inexperienced gardeners frequently turn to more experienced ones at this stage and ask how they can restore this favorite plant to good health.
In reality, it is usually a fairly easy problem to solve so don’t get discouraged and read on for some ways to identify a pot-bound plant and more importantly, how to fix it!

What are the signs that a plant is pot-bound?
- You spot some roots growing out of the bottom of the pot.
- Another sign of a pot-bound plant is poor foliage growth, or leaves that have lost their lustre and the whole plant just looks a bit sad.
- The whole plant seems to be bursting out of its pot at the top, with roots starting to form over the soil level but the leaf growth has slowed down. Succulents often give you clues like this. The pot goes very top heavy too and it falls over easily.
You will need to remove the whole plant from the pot so you can take a good look at the roots. Here are some steps to removing the plant from the pot so you do not damage the roots followed by some tips about how to get your plant back to good health.
The first step – remove the pot
Imagine the pot is a very tight, expensive shoe that you need to pull off gently but not damage by pulling it out of shape. Your plant is a living thing and the pot is the shoe!
The first thing to help the process along is to water the plant generously. Then allow the whole pot to stand and soak in a bucket or basin of water (or the sink) for another 45 minutes, to make the exit easy and not traumatic. I usually add some warm water so it does not come as too much of a shock.
- After about 45 minutes, try to gently loosen the soil at the edge of the pot with your finger or a plant label and then holding the stem, turn the whole pot over while carefully supporting the stem. Make sure you take the weight of the plant and that the stem is safe.
- Sometimes the plant just falls out naturally, if you’re lucky! If this happens take a good look at the roots and then carefully place them into the water to rest while you get your tools ready.
- If the pot does not fall out, then gently squeeze the pot at the sides and turn it upside down but support it, so that when the plant falls you can catch it in the palm of your hand. If (like me) you talk to your plants, reassure this one all the way, telling it that it is going to a new home with plenty of rich soil so that it can thrive.

Now the plant is in water, allow it to soak
Leave the plant in tepid water as soon as the plant releases from the pot. Make sure the water is deep enough to cover the whole root ball and that the stem is supported by the edge of the basin or the sink.
- After another 15 minutes, try to ease out some ends of the roots so they hang vertically.
- Don’t rush the process; check every 15 minutes or so and ease the roots out as the water loosens the soil.
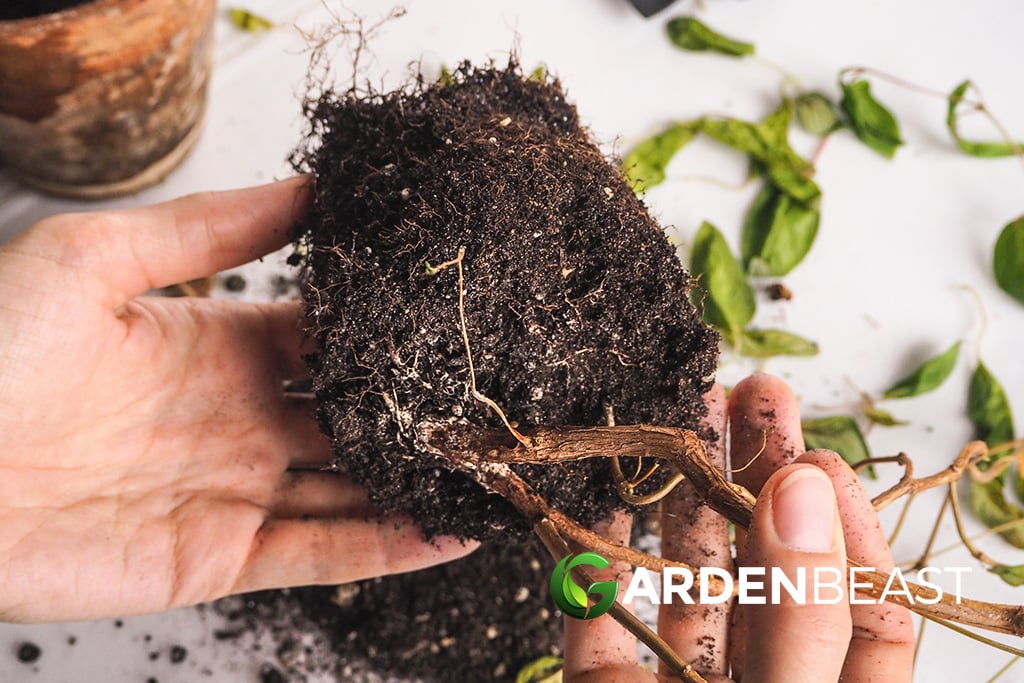
Check the roots
Are the roots brown? Are the roots white? Is there a mixture of both colours? Is there a pad of white roots all curled around in the shape of the pot?
- If the roots are white, then breathe a sigh of relief because this means they are still healthy and there is probably no root rot. After removing the pot carefully, leave this plant in the water to settle for another 30-45 minutes and then re-pot it. See how to do this below.
- If the roots are white and growing in the shape of the pot, then you have left it very late to re-pot and that is the next step. Leave them in the water for most of the day if you need to. It will not do any harm. Each time you pass, try to gently ease out the roots. This may take some time and you will find the roots in that circular shape so tease them out slowly but surely and then re-pot.
- If the roots are brown, your plant is in trouble – see root rot below.
- If the roots are both white and brown, there is a still good chance to save some parts of your plant. Brown roots need to be removed but keep the white ones.
- After another 15-30 minutes soaking in water, try to carefully ease out some ends of the roots so they hang vertically not curled in the shape of the original pot. To do this, it is important not to force the roots. Just in the water, rub slowly so that the roots start to separate. Trust that the plant wants to root vertically and help it to do so.
- Next, decide if the plant needs to be separated. The rocket salad plants pictured below were easy to separate because I separated the pot in half, took a clump of roots and laid them flat out on the soil, as pictured. These can now fit nicely into a straight soil row of cut-and-come-again lettuce. I find salad to be very forgiving if the roots are very young and they adapt to being in the ground very quickly by growing very vigorously.
- Succulents and cacti can be separated into smaller plants at this stage too. Try to make sure some root is attached to the offsets. Some leaves can grow new roots easily but this is another article!
- Herbs like mint actually prefer to be re-potted and divided every 3-4 years like this but be careful with some flowering bulbs because some will only flower if their bulb fits right up against the edge of the pot.

Dealing with root rot and how to avoid it
This is exactly what it says – if your roots are rotting, they may smell bad and the roots are brown and slimy. Some parts of the roots may still be white; if so, cut any white roots with some foliage if possible, and use these to re-pot or to make new cuttings.
Good hygiene is essential! Use clean, sterilised secateurs or scissors and then cut away the brown roots and dispose of them. Do not place these in our composting area.
Sterilise the cutters again to avoid spreading root rot to healthy parts of the plant. Then choose white roots with some green foliage, and then wash these newly cut plants and allow these to dry for several hours.
Root Rot Recovery plan:
- Stop overwatering! Allow the plant to dry out completely. It is best to remove the plant from the pot and lay it on some newspaper or cloth in a warm environment, and then test touch it after 24 hours to see if the roots feel dry. Give it another day to fully recover.
- Overwatering is the chief cause of root rot. Plants may not require water every day and still get it. This means the roots get waterlogged. Check the frequency of watering for your plant and stick to it!
- Water the plant adequately. Leave clear instructions for house-sitters who may be tempted to water the plant every day!
- Cut the brown roots off and discard them safely so that the rot does not come into contact with other plants.
- Good drainage. This avoids excess water sitting in the pot so that the roots get a chance to dry out. Many exotic plants prefer to be watered occasionally and then they flower, just like after a downpour in the rainforest. However, they also get a chance to dry out so repeat this with your house plants.
- Take cuttings of favorite plants. Most plants have a limited life. Some seem to last generations like the Jade plant but if you have a particular favourite, then take cuttings or offsets to make sure you have a replacement.

How do I fix the pot-bound plant once it’s out of its old pot?
You need to re-plant or re-pot your plant. This is generally called potting on. You can plant directly into a garden bed if the plant will survive outside or choose a new, bigger pot.
- Check the size of the existing pot. Usually, I advise a new pot that can allow for the extended roots to grow downwards while adding 10-20 cm soil extra in depth, and the width of the pot should also allow for roots to grow sideways. However, if your plant roots looked fairly healthy, you may just want to change the soil and add a new layer of topsoil but keep a close eye on it.
- Check the adequate soil for the plant eg succulents and cacti need sandy, poor soil while a house plant may need nutritious soil because it has used up all the goodness in its previous pot.
- Is the plant one that only flowers in a tight pot? My Amaryllis is like this and for 2 years after re-potting, I never expect a flower until the bulb gets comfy in its new size. Bromeliads are not supposed to be re-potted at all so check the care label of your plant.
- Add a few pebbles to help drainage. You do not want your pot-bound plant sitting with wet roots now that you know how bad root rot is! Set up a watering system to suit the plant and check for signs in about 1-2 years, depending on the plant.
- Add a layer of compost to the bottom of the pot. Place your whole plant in the new pot and then add damp compost around the plant to make sure the roots are all covered well. Press the soil down at the top of the pot and keep adding compost until the plant looks settled and secure.
- Water the plant well. This settles the soil around the roots and it is important to allow the excess to drain away, particularly if this plant is prone to root rot.
- Keep the re-potted plant in a sheltered position. For a few days, make sure it is not in a draught or a cold spot and when you spot some new green foliage coming, you can put it back into its normal spot.

How to get your plant back to good health.
The most important thing is to become an expert at dealing with your plant. Know the conditions it requires and make sure it gets them. Other points to help include:
- Use sterilised soil and tools, when dealing with any disease.
- Feed the plant only if it needs it. Check its requirements. Some do not need feeding at all. Some need the soil changed annually. Some prefer poor soil. So do not use tomato feed on a cactus! Comfrey feed
- Check for draughts, overheating, the wrong light, or lack of humidity.
- Look for signs of trouble and deal with them. Is there no new foliage? Could that be too much or too little direct sunshine? You need to know which your plant prefers.
- Check for pests – indoor plants get scale insects, aphids and thrips.

Conclusion
You should be confident now that you can check the roots of your plant to see if it is pot-bound, and also that you know how to deal with it if it is. Hopefully, you have learned that you are the best expert your plant can have so enjoy learning how to care for your favourites and keep them healthy!