
The fact that the COVID pandemic produced at least one really cool and healthy side effect — one that can best be described simply as “green thumb” — is well-known by now, but the current plant craze actually dates from well before these strange times.
As far back as 2016, a US National Garden Survey revealed that six million novices decided to take on gardening. The overwhelming majority were Millennials, but even Gen Z and Gen Alpha have taken to indoor and outdoor gardening.
What do we do when we discover something awesome, something we’re super excited about and simply can’t get enough of? We share it with the world, of course. In this day and age, you don’t have to be an aspiring botanical photographer to be itching to know how to take better pictures of plants.
More likely, you’re just hoping to show your rare Monstera or amazing pothos off in its very best light on Insta. Perhaps you’ve successfully propagated a few plants, or taken cuttings, and are now hoping to sell them on a Facebook group; excellent pictures will help you get there, and that’s why you want to get better at taking photographs of plants.
You won’t necessarily have a professional camera, with a wide range of different lenses that all do different things. More likely, you’ll have a smartphone and most likely, you don’t know all that much about photography. That’s more than OK. It just shows how one cool new hobby — gardening — can turn into a whole new one (photography!).
We’ve put together some very beginner-friendly photography tips that can take your skill to the next level, whether you’re hoping to go out and take pictures in the wild, or just capture your houseplants.
1. Quite Literally Show the Plants You’re Taking Pictures of in Their Best Light
If you’re taking pictures of plants in their natural environment, you’ll only have natural lighting to work with — but even people who would like to photograph their treasured houseplants can make full use of the light outside to get the most captivating images possible.
You really have two basic choices when it comes to natural lighting:
- Time your plant pictures during the so-called golden hours if you would like to create a warm effect. This means you can either shoot your image at dawn, as the sun rises, or at dusk, as the sun sets. Making this choice adds a wonderful orange glow to your photos, which usually pairs well with lush or tropical plants. It also adds a magical touch to plants with red foliage or stems, like Virginia creepers or red twig dogwood.
- To create a cooler effect, you can shoot your picture slightly later or earlier in the day, especially when it’s overcast. This is a great way to emphasize the winter-like quality of needled evergreens like Japanese umbrella spines or dawn redwood, or to highlight the clean white or cream shades of silverbells, white roses, or magnolias. What’s more, cooler lighting truly brights out the green in any foliage.
Photographers can also use a reflector disc or ring light to render gloomy areas much lighter, without ruining the mood. Midday light, meanwhile, has a nasty habit of ruining any photograph, including pictures of plants. Don’t do it!
2. Learn How to Create a Perfect Composition by Framing Your Plant
When we take casual snapshots, including selfies, the subject of the image tends to be front and center. Those plant photographers who want to create an artistic impression usually won’t want to choose the same route.
Instead, unless they care taking a close-up, they will want to think carefully about the composition of the image and the way they frame the main subject — a single plant, or a group of plants.
You can achieve better results by:
- Ensuring that there’s something interesting in the backgrounds, that adds to your picture rather than distracting from it. This will be your “frame”. If you’re taking pictures of your outdoor garden, or in the woods, that may mean larger trees, hanging vines, or even beautiful brick walls, form the backdrop and frame your picture. If you’re taking pictures of houseplants, a window, desk, or plant stand can play a part in the composition.
- Placing the plant slightly off-center in your composition. Plants are wild things, and often, creating perfect symmetry will ruin the art in your picture. Try to follow the rule of thirds, wherein your subject matter appears in one third of the image and your remaining two thirds remain fairly empty. When surrounded by other greenery, your plant should still be the star of the show.
- Where there are shadows, make the most of them by incorporating them into your frame, if this improves the look of the picture.

3. Setting the Stage for Beautiful Plant Pictures in Your Home
Are you posting pictures on social media, and are you quite interested in the artful things people can do with Photoshop? You have probably heard of James Friedman, a photoeditor who pranks the multitude of people who beg him to “make my legs longer”, only to find he’s taken the assignment a bit too literally.
You may want to edit the lighting later, but here’s a tip — if you are taking pictures of your beloved houseplants, get the content right on your first try, so you won’t have to turn to someone like Friedman later on.
Some tips to help you do this include:
- If you have an excellent camera, any dust — including the dust that can accumulate on Monstera leaves, for instance — will be visible in your image. Take care of that before you start shooting.
- Tidy up first. It’s got to be said, so consider that done.
- You can usually move your houseplants to the best possible spot, to get the best possible framing and a truly shareable picture, without any trouble. Some sensitive plants get stressed easily, and won’t like it if you move them to 100 different locations to take a bunch of pictures, so known your plant before you photograph it.
4. Take Beautiful Close-Ups of Your Plants
Nature is amazing. People who want to snap a photo of a beautiful plant they encounter in the wild to be able to identify it later will, of course, want to photograph the entire plant — as this will help them get a good look at all the plant’s parts.
If you’re in it for the art, however, never feel compelled to get the entire plant into your frame. Instead, also consider experimenting with artistic close-ups. One flower. The top of a spiral aloe. A highly-zoomed in picture of some cactus spines.
Just a thick stem with impressive sharp thorns. The silvery underside of a leaf. All of these choices evoke unique emotions, and emphasize one part of the plant’s essential being.
As long as you can get your close-up to focus just right, these kinds of photos are also quite hard to get wrong — no matter what part of the plant you choose to highlight in your image, it will work very nicely.

5. Get Creative When Photographing Plants
Take a good look at your natural environment — and try to work with what you’ve got! Can you catch a bee working an especially pretty flower? Go for it!
Do you see a perfect opportunity to show the cycle of life off by photographing a fallen leaf next to a newly sprouted little sapling? Wonderful! Have you spotted an oddly-growing little runt of a tree, or a head of lettuce damaged by snails? Take the chance to capture nature in all its glory.
First, learn the basic rules of photography — and then, with time, rise above them, photographing at odd angles, with strange lighting, or with bizarre filters. The more you can allow your inner creative mind to come out, the more interesting your results will be.
We never said “better”; just “more interesting”. The good thing? You only ever have to post the plant photographs you are truly proud of.
6. Experiment with Angles to Capture Plant Textures
Plants exist in a three-dimensional space, but pictures are only two-dimensional. Experiment with a wide variety of angles (as well as lighting conditions) to see how they affect the texture that shines through in your imagine.
You can also try to mist your houseplants before photographing them to allow their texture and freshness to shine through even more.

7. Don’t Be Afraid to Try Different Editing Techniques for Your Plant Photographs
Photo editing has evolved to be point where even total novices can easily download a free app to manipulate the image that they have captured. We’re not talking about removing parts of your image or adding anything, but mainly about the lighting.
Try downloading some landscape presets to alter the lighting quality in your plant images, and don’t be scared to try every single option before finally settling on the one that shows your subject at its most amazing.
8. Take Some (Free) Photography Lessons to Take Your Plant Photographs to the Next Level
The internet is the tool you’ll use to share your plant photos with the world — or at least your friends. It can just as easily be the place that takes you from noob to semi-pro.
Those who are willing to invest a little money into their new hobby can play around with photography courses on platforms like Skillshare or Master Class, which don’t have to break the bank.
Even if you’re not quite willing to call yourself a hobbyist photographer yet, it never hurts to turn to YouTube to improve your technique. That will only, after all, take a little bit of your time.
Hint — if you’re interested in taking a photography course or two, remember that you don’t have to look for courses that specifically focus on plant photography to be able to take better pictures of plants.
General photography courses that focus on landscapes rather than portraits will arm you with the tips you need to take pictures that are light years better than those you took yesterday.
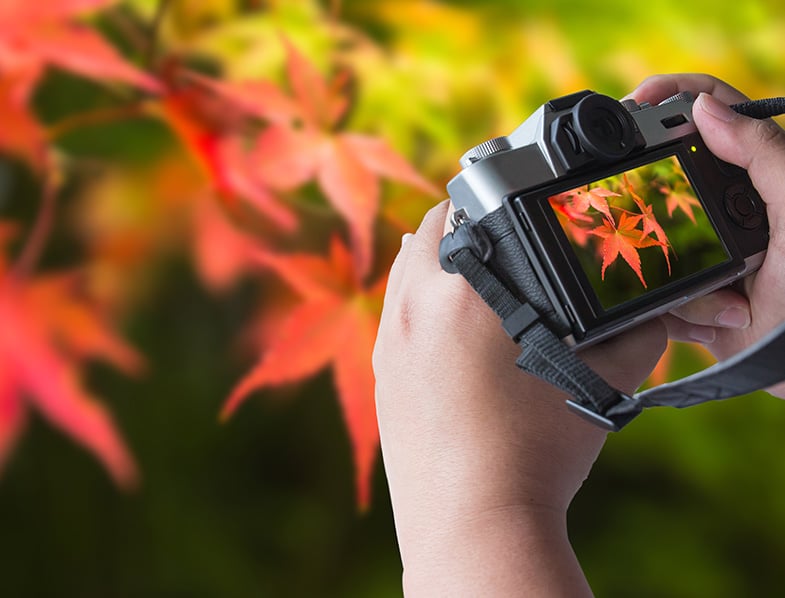
9. Invest in Better Equipment to Take Beautiful Pictures of Plants
Smartphones have come a very long way since they first emerged, and there’s no question that your phone can snap wonderful pictures with a very decent resolution. No matter how excellent your smartphone is, though, it will never offer you the freedom you will gain with a semi-professional camera that has multiple lenses and a detachable flash.
Good cameras for up and coming amateur photographers include the Canon T6i, Sony A7R III, and Nikon D3400, but you have many other options, too. Features you will want to look for if you truly want to take breathtaking plant photos include:
- A Digital Single-Lens Reflex (DSLR) camera
- A wide angle lens to help you take amazing landscape photographs
- A zoom lens
- Remote shutter release
You’ll also get much better results with a tripod, so invest in one!
Taking (plant) photography courses can easily turn into a serious time commitment, while buying a semi professional camera is a significant investment. While there’s no question that both will help you take beautiful plant photos, not everyone will want to go there. Don’t worry — even arming yourself with basic tips will help you take your plant photography to the next level on your smartphone.
On Conclusion
Plants are always in flux, and one of the most interesting subjects for photography. Taking pictures of houseplants and plants you find growing in the wild is a great way to blend your love of botany with your excitement about photography. We’re not going to lie — it takes years to become a great photographer. Every tip you take onboard, however, will make your next plant picture that much better!