
Are you looking for a way to make your yard look tropical? Growing a peace lily or two gives your garden a tranquil, serene look, improving its aesthetic. The peace lily is a favorite of gardeners in warmer locations and beautiful addition to any flowerbed or rockery.
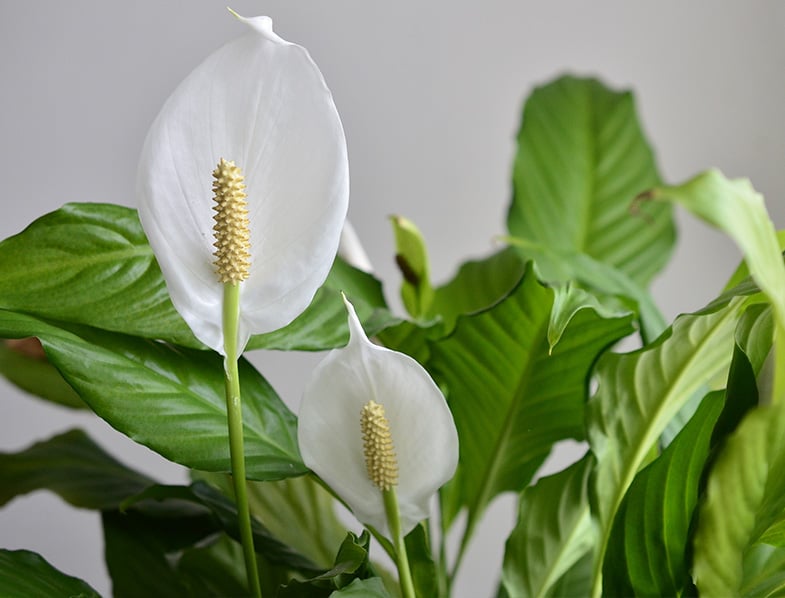
The peace lily got its moniker from its white flowers that take the appearance of white flags, traditionally a sign of a ceasefire and the establishment of peace after a military conflict. However, the peace lily isn’t officially a part of the lily genus.
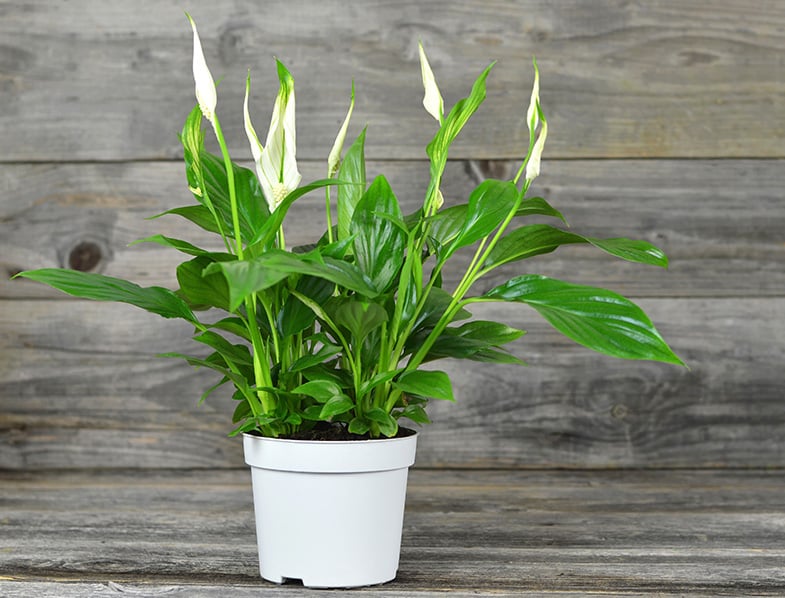
The peace lily is a tropical perennial, meaning they can last throughout the years, blooming again and again, provided you give them the right care. These flowers are the ideal addition to the home or office garden, and they require minimal maintenance throughout the growing and dormancy phases.
The peace lily also makes a suitable indoor plant. It’s one of the few indoor plants that act as an “air-scrubber” purifying the air inside your home. The peace lily reaches heights of between one to four feet, making it a somewhat short-statured plant with a striking appearance.
The luscious dark green leaves create a stunning contrast to the white flowers. This post gives you everything you need to know about growing peace lilies in your yard this season.
Where Do I Plant My Peace Lilies?
Peace lilies are durable and hardy plants, and they grow well in subtle lighting conditions. However, placing them in shady areas means that they might not bloom, and that’s unfortunate, considering the striking beauty of the flowers.
For the best results, place your peace lily in a part of the yard that gets indirect sunlight. It’s important to choose a planting site offering optimal airflow around the foliage, or you might end up with white powdery mildew infecting the plant in cold climates or overcast, rainy conditions.
Peace lilies are also temperature-sensitive, and placing them in places with drafts may cause the plant to fail to bloom or die. They do better in warm climates, with a spot in the yard offering protection from wind and cold rain.
Most gardeners grow peace lilies as indoor plants, but they’re suitable for planting outside, provided you have the right growing conditions. To plant outdoors, you’ll need to reside in USDA growing zones 10 to 12 for the best results.
Plant your peace lily in a shady spot that gets plenty of bright, indirect sunlight and keep the soil moist at all times. Drying out the soil affects the growth rate and flowering of the plant.
How to Plant Your Peace Lily
If you’re growing in containers, make sure you provide the plant with enough space for the roots to spread. These plants get root-bound in smaller containers, but they also don’t like growing in containers that are too large for the root ball.
For best results, plant them in a container offering a snug fit and optimal soil drainage to prevent root rot from occurring in the plant from heavy watering. After selecting your pot, fill it with potting mix. The peace lily is a somewhat heavy feeder, requiring soil rich in nutrients for it to thrive.
Make sure your potting mix doesn’t contain any bark or compost, as these materials attract fungus gnats which kill the plant. Soil mixes containing coconut coir are ideal, providing plenty of air to the roots while holding onto water.
Place your peace lily in the center of the container, with the root ball sitting an inch below the rim. This planting position leaves room for watering. Fill around the root ball with your potting mix, and press down lightly with your hands to collapse any air pockets in the soil.
After planting, saturate the soil until water starts to drain from the bottom of the container. For optimal drainage, line the bottom of the container with a 1-inch layer of desiccated granite.

- USDA Certified Organic by Oregon Tilth
- 10 culinary herbs packed fresh for the current and following year
- Varities by common (Scentific name) format: thyme (Thymus vulgaris), italian oregano (Oreganium vulgare), caribe cilantro (Coriander sativum), giant italian parsley (Petroselinum crispum), english lavender (Lavandula angustifolia), genovese basil (Petroselinum crispum), broad leaf sage (Salvia officinalis), bouquet dill (Anethum graveolens), common chives (Allium schoenoprasum), & thai basil (Ocimum basilicum)
- 100%: non-GMO, open pollinated, trusted varieties
- Seed-starting video guide access is included, with tips printed on the back of each packet

- Upright habit; 12 to 36 inches tall, 9 to 24 inches wide
- Zones:Although Z. aethiopica can be grown in Zones 8-10; hybrids are more comfortable in Zone 9 and warmer. Or treat them as annuals in colder climates
- Full sun to partial shade; with bright, indirect light being ideal. Dense shade might put a damper on bud count, and scorching midday summer sun can prove equally challenging.
- Flower stalks begin shooting up about eight weeks after planting, and you'll be delighted by blooms for the next couple of months.
- Flower Color:White, pink, coral, maroon, orange, yellow

- All of our listings have very representative pictures of what you would receive.
- This plant comes fully rooted in a 3" pot, ready to grow in and your beautiful home or your office.
- California Tropicals
- Perfect gift for any occassion!
Last update on 2025-11-24 / Affiliate links / Images from Amazon Product Advertising API
Watering Your Peace Lily
The peace lily is a heavy drinker, requiring the soil to remain moist at all times. Leaving the container and soil to dry out stunts growth and inhibits flowering. If you look at your peace lily one morning and it’s falling over, it means the plant isn’t getting enough water.
Feeding Peace Lilies
A month to six weeks after planting the lily, you’ll need to add soil amendments or fertilizer to keep growth progressing in the plant. The peace lily enjoys nutrient-rich soil, and adding a liquid plant fertilizer diluted to half-strength is more than sufficient to keep the peace lily happy.
Repotting Your Peace Lily
Peace lilies don’t mind a bit of crowding in the pot, but they will start to fail if they get root-bound. To avoid this occurrence, you’ll need to plant the peace lily out into a larger container. You’ll know it’s time to plant out the peace lily when the flowers start wilting faster.
Select a new container that’s around two to three inches larger in diameter than the previous pot. You’ll follow the same guidelines mentioned earlier for repotting the plant.
Troubleshooting Problems with Your Peace Lily
The peace lily grows without presenting many issues. However, gardeners need to watch out for the following problems with their plants.
Fungus Gnats
If you use the right potting mix for your plant, you shouldn’t ever encounter problems with fungus gnats. However, soils that don’t drain well lead to the onset of this condition. It’s a life-threatening problem for your plant.
To kill the gnats, you’ll need to cut back on your watering schedule. Let the soil slightly dry out between watering, but this might not solve the issue. As a last resort, Bacillus thuringiensis can kill off the gnat larvae nesting in the soil.
Yellowing Foliage
As the peace lily gets older, the foliage turns from dark green to a light yellow. You’ll need to remove these leaves by cutting them away at the base of the plant.
Brown Edging
The peace lily will burn in direct sunlight, and you’ll need to move it into the shade to help it recover. Leaving it in the sun results in further burning and the death of your peace lily.
Failing to Bloom
If the peace lily fails to bloom, it’s not getting enough indirect sunlight. Move it to an area of the yard or your home that provides optimal lighting conditions for the plant.
Dusty Foliage
If your plant starts getting dusty leaves, take it outside and spray it down with water.
General Notes
The peace lily is a hardy and resilient plant. If you notice any foliage problems or drooping in the plant, adding water or placing it in the right lighting conditions allows the plant to make a rapid comeback to full health.
A Note on Toxicity
As a member of the spathiphyllum genus, the peace lily isn’t actually a real lily. Therefore, the plant doesn’t have the same toxic effect as real lilies. However, the peace lily does contain high levels of calcium oxalate, causing kidney distress and failure in cats and dogs.
It’s important to educate your kids about the dangers of ingesting the flowers and leaves of the peace lily, keep them away from small children that might tear away the leaves or blooms and decide to eat them.
Pet owners should keep the plants out of reach of their animals. However, most dogs and cats are smart enough not to eat the leaves, and if they do, they’ll typically spit them out because they taste terrible.
The oxalates in the leaves and flowers of the peace lily create inflammation and irritation in the mouth, throat, and stomach lining, resulting in gastrointestinal distress in humans and animals.
If your cat or dog does ingest the plant material, they’ll end up increasing salivation rates, pawing at their mouth due to the irritation and discomfort. The animal might also shake its head in an attempt to rid itself of the pain.
If your cat or dog likes playing with your houseplant, add some deterrent to the watering dish. Coffee grounds and citrus peels deter cats and dogs, and they’ll leave the plant alone.
If your pet does show signs of peace lily poisoning, take it to the vet immediately for assessment and treatment. Most of the time, the animal will survive without any life-threatening complications. The chances that they attempt to eat the plant again are slim.
Growing Peace Lilies – Key Takeaways
- Plant your peace lily in the right potting mix, in a pot that provides a somewhat snug for the root ball.
- Place the peace lily in bright, indirect sunlight, either indoors or out in the yard.
- Keep the soil moist, and ensure there’s proper drainage to prevent root rot in the plant.
- A month to six weeks after planting, add a diluted plant fertilizer to help the lily with flowering.
- Repot your peace lily when the roots start to reach the edges of the container. Repot in a container that’s around two to three inches larger in diameter.
- Look out for issues affecting the health of the plant and treat them as they occur.