
You can find more types of seeds than you can imagine in markets and nurseries and that’s awesome. But isn’t harvesting your own seeds much more satisfying? When we love our plants and provide them with adequate overall care, they are more likely to complete their yearly cycle and produce beautiful, well-grown seeds. And it would be such a waste not to take advantage of their many benefits!
In most cases, gardeners use the seeds right after they collect them from the mature plants. Sometimes, however, we need to keep our seeds fresh and healthy for the next year or for the next growing season. Whether it is for propagation or various nutritional purposes, the seeds will show the best results only when they are properly stored before planting or consuming.
When it comes to storing seeds, it is very important to keep an open mind. This new challenge is your chance to develop an interesting skill that will provide useful on your gardening journey.
By the end of this article, you will have plenty of information about storing seeds and you’ll be able to do it like a pro. Needless to say, you won’t have any problems adding new members to your plant family over the next seasons.
General Rules for Storing Seeds
So, it seems that your innate curiosity convinced you to give a chance to seed storing. The first step is already complete! In fact, storing seeds can be an easy process when you are passionate and pay attention to a few important details. At the end of the day, you will be more than pleased to find out that your baby seeds will not require much effort on your part. Keep reading to find out more about the general demands and environmental requirements for storing various seeds.
- Successful storage begins with a nice seed harvest. Save time by storing only seeds that seem viable, healthy, and of good quality.
- Make sure you are using seeds collected from mother plants that were acquired from a reputable supplier or nursery. This rule of thumb is also valid for purchased seeds.
- Avoid storing seeds from hybrid species of plants. Hybrids are always inferior to the parent plants and have a lower chance of coming true from seed.
- You can store seeds properly only if they are completely dry. The seeds are best stored in airtight containers.
- The containers should be placed in a dark or very dimly lit location with cool temperatures and low humidity levels (dry air).
- To maintain the seeds dry, many gardeners throw some milk powder or silica gel in their storage containers. These substances will absorb all the available moisture.
- For faster germination and optimal growth, it is recommended you use the seeds as quickly as possible after harvesting.

Varieties of Seeds and Storage Viability
Although the storing methods are similar and show the same results for all types of seeds, in some cases, they need to be stored differently. Not only do seeds come in unique shapes and sizes, but they are also variable in storage longevity. While some properly stored seeds can last for a year or less, others can be used even after five years of being in storage.
A few examples of short-lived seeds that must be used quickly are:
- Sweet corn
- Parsnip
- Parsley
- Onion
- Leek
- Pepper
Varieties of seeds that are medium to long-lived, lasting up to five years:
- Eggplant
- Peas
- Pumpkin
- Celery
- Carrots
- Beans
Seeds that can maintain good viability for at least five years include:
- Brassicas (cabbage, cauliflower, broccoli, Brussels sprouts, etc.)
- The chicory group (radicchio, escarole, endive)
- Sunflower
- Cucumber
- Tomato
- Lettuce
- Melons
Quick Guide to Storing Seeds Correctly
If the seasonal seeds are already harvested, you are now ready to find out how to store them properly until next year. Our guide is designed for all types of gardeners, so you should not get discouraged by your possible lack of experience. If you follow these steps accordingly, you will have a nice and guaranteed jump-start in the next growing season.
Step 1 – Dry the Seeds
If you want to collect seeds from the mother plants and save them for a longer period, you must dry them immediately after harvesting. Spread the seeds on absorbent materials, such as a newspaper, and allow them to dry naturally for a week or so. To avoid mixing up the seeds, make sure you group them into categories and use labels to write down their individual names.
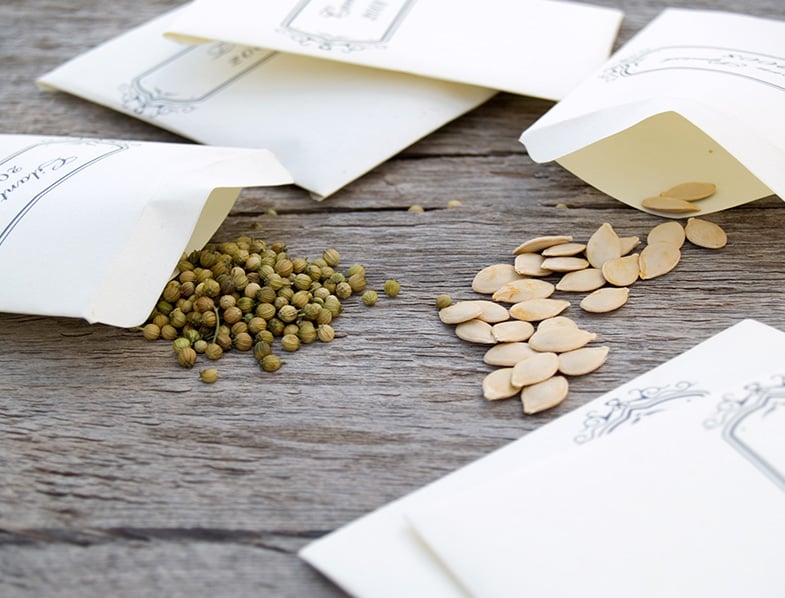
Step 2 – Pack the Seeds
Pack your air-dried seeds in envelopes or small crumpled pieces of paper. Regardless of where and how you store the seeds, remember to label them with names, dates, and other important information.
Some growers also prefer to dry the collected seeds on paper towels for optimal drainage. When the seeds are dry on one side, they will start to stick to the paper towels. You can roll them up right from the beginning to ensure full drying and even store them for a while. If you are using this method, the seeds will be ready for planting all-year-round. When you decide to plant the seeds into containers, remove some bits of the paper towels from each seed and plant them individually directly in the soil.
Step 3 – Stash the Seeds in Airtight Containers
The seed packets that you’ve prepared can be stored in various airtight containers including plastic food storage bags, glass canisters and lids with gaskets, and Mason jars with well-fitting lids. As long as the seeds will remain dry during the storing period, the type of container does not really matter. Not sure if your seeds will remain dry for a long time? Well, you have a few life-saving options around the corner!
The first method consists of wrapping one or two teaspoons of milk powder in small pieces of facial tissues. Place these milk powder packets inside the airtight container. Another method to maintain the ideal humidity levels around your seeds is to include desiccant packets (silica gel) in the container along with the seeds. Either way, the packets must be replaced once every six months.
Step 4 – Place the Containers in Dry and Cool Places
As mentioned above, high humidity levels and warm temperatures are known to shorten the seeds’ lifespan. You might be tempted to place your seeds in the refrigerator, but this is the most common mistake gardeners make. Due to many environmental and uncontrollable factors, the refrigerator tends to fluctuate in humidity levels and will also kill many varieties of seeds.
Of course, the seeds found in nurseries or markets are usually stored through freezing, but their laboratory conditions are beyond what we could simulate at home. However, if you have no better location than the refrigerator to store your seeds, avoid placing them near the freezer.
In general, the seeds stored in airtight containers must be protected from any heat source and even away from sunlight exposure. They are best stored in temperatures that range from 40 to 50 °F (4-10 °C) all-year-round.
Step 5 – Prepare the Seeds for Planting
This is the most exciting part of storing seeds and our main goal − planting! Bring the containers out of the basement or refrigerator and wait for the seeds to acclimatize to the warm room temperature. If you open the containers immediately, the moisture from the air will cause the seeds to clump together and become without use. Once the containers feel warm to the touch, after a day or so, you can open them to enjoy your healthy and well-stored seeds.
Step 6 – Make Peace with Any Possible Duds
You should know that some stored seeds will not germinate at all even regardless f how consistent, organized, careful, or experienced you are in the gardening world. When you work with certain types of seeds, such as parsnip, leek, or sweet corn, you should know that they have particularly low germination rates. And what could you do more than just accept their natural way of being? Look at the full side of the glass − there will always be plenty of other seeds that made it through the storing period, so move on and do your best to have more baby plants around!
Step 7 – Plant the Seeds
For optimal germination, make sure you expose the seeds to air for a few days before planting them. Do not use regular potting soil when starting seeds indoors, as it usually contains bacteria and fungi that can harm the seeds or seedlings over time. It is best to fill a container with a fresh and sterilized starting mix that is designed to provide both water drainage and retention.
Once you’ve planted the seeds, keep the temperatures constant, and never allow the soil to dry out. Keep in mind that they prefer temperatures between 70 and 74 °F (20-24 °C) and a substrate that is evenly moist, but not over-watered. After germination, ventilate the seedlings regularly and harden them off before transplanting them outside. Sudden cold temperatures and damp conditions can result in irreversible damage or death, so make the transition gradually.
In Conclusion
That’s it, you are now a seed storing master! We hope that our guide was helpful enough to motivate you to harvest seeds from your plants and to use them for propagation. Believe us, nothing can be more satisfying than watching your well-stored seeds germinate and transform into happy and healthy new plants. That is the moment when you know that all the time, care, and devotion you’ve put into it was worth it!